Showing posts with label Tips and Trick. Show all posts

Thursday, December 29, 2011

Music Player at Bactrack

|1 comments

For those users who want a backtrack video player or music in Backtrack, there are little tricks that should be done to be able to use VLC Player on backtrack 5.

that step as follows :
1. install vlc
type the following command in the terminal
apt-get install vlc
2. if vlc directly executed, it will display an error because the defaut vlc can not be run on root privileges. then do the following:
3. install hexedit
apt-get install hexedit
4. edit the file using vlc with hexedit
type the following command in the terminal
hexedit /usr/bin/vlc
5. press tab to move to the mode string
6. press ctrl + s to perform a search geteuid
7. geteuid change with getppid
8. press crtl + x to exit
reboot yout Backtrack, then run vlc player.

Install Chromium at Backtrack

|0 comments
 
For those of you who missed the users web browser backtrack chromium, there is a little trick that should be done to be able to use chromium in backtrack 5.

Perform steps - steps as follows:
1. download chromium browser
type the following command in the termina

apt-get install chromium-browser
2. if chromium is directly executed, it will display an error because the defaut chromium should not be run on root privileges. then do the following:
3. go to the folder of chromium-browser
type the following command in the terminal
cd /usr/lib/chromium-browser
4. edit the file using hexedit chromium
type the following command in the terminal
hexedit chromium-browser
5. press tab to move to the mode string

6. press ctrl + s to perform a search geteuid
7. geteuid change with getppid
8. press crtl + x to exit

Install Virtualbox at Backtrack

|0 comments

In BackTrack 5 not yet installed virtualbox, below are the installation steps.

Backtrack 5 is not accompanied with the kernel headers already installed. So, we need to download and proceed with installing VirtualBox. steps as follows:


root @ bt # prepare-kernel-sources
root @ bt # cd /usr/src/linux
root @ bt # cp-rf include /generated/*include/linux/


After the above is completed, edit /etc/apt/ sources.list as enumerated below:

root @ bt # echo deb http://download.virtualbox.org/virtualbox/debian lucid contrib non-free>>/etc/apt/sources.list

donwload it:

root @ bt # wget-q http:// download.virtualbox.org/virtualbox/debian/oracle_vbox.asc-O-| sudoapt-key add -

root @ bt # apt-get update


root @ bt # apt-cache search virtualbox

root @ bt # apt-get install virtualbox-4.0


Beautify the Linux Terminal

|0 comments
Want to have your terminal word can you change what you like?

There is a way, first open a terminal and then type the command:
sudo apt-get install figlet

edit file  .bashrc
# root@BackTrick$ gedit .bashrc

PS1='\[\e[1m\][\u@\h][\W]\n\[\e[1m\][\$]\[\e[0m\] '
Columns=$(tput cols)
Startpoint=$(($Columns-22))
Color1=`tput setab 2`
Color2=`tput setab 5`
Normal=`tput sgr0`
Time=`date +%r`
Date=`date +"%d-%m-%Y"`
tput sc
tput cup 0 $Startpoint
echo -n $Color1$Time $Color2$Date$Normal
figlet "BackTrick"


script :
Columns=$(tput cols)
Startpoint=$(($Columns-22))
Color1=`tput setab 2`
Color2=`tput setab 5`
Normal=`tput sgr0`
Time=`date +%r`
Date=`date +"%d-%m-%Y"`
tput sc
tput cup 0 $Startpoint
echo -n $Color1$Time $Color2$Date$Normal
adalah :
11:24:16 PM 29-12-2010

You can change color according to your desired color .. by replacing the existing code in this lineColor1=`tput setab 2`
Color2=`tput setab 5`

0 black
1 red
2 green
3 yellow
4 blue
5 magenta
6 cyan
7 white

they are list code tput color .

Tuesday, November 1, 2011

Installing Gnome Shell On Ubuntu Oneiric OCELOT 11:10

|0 comments

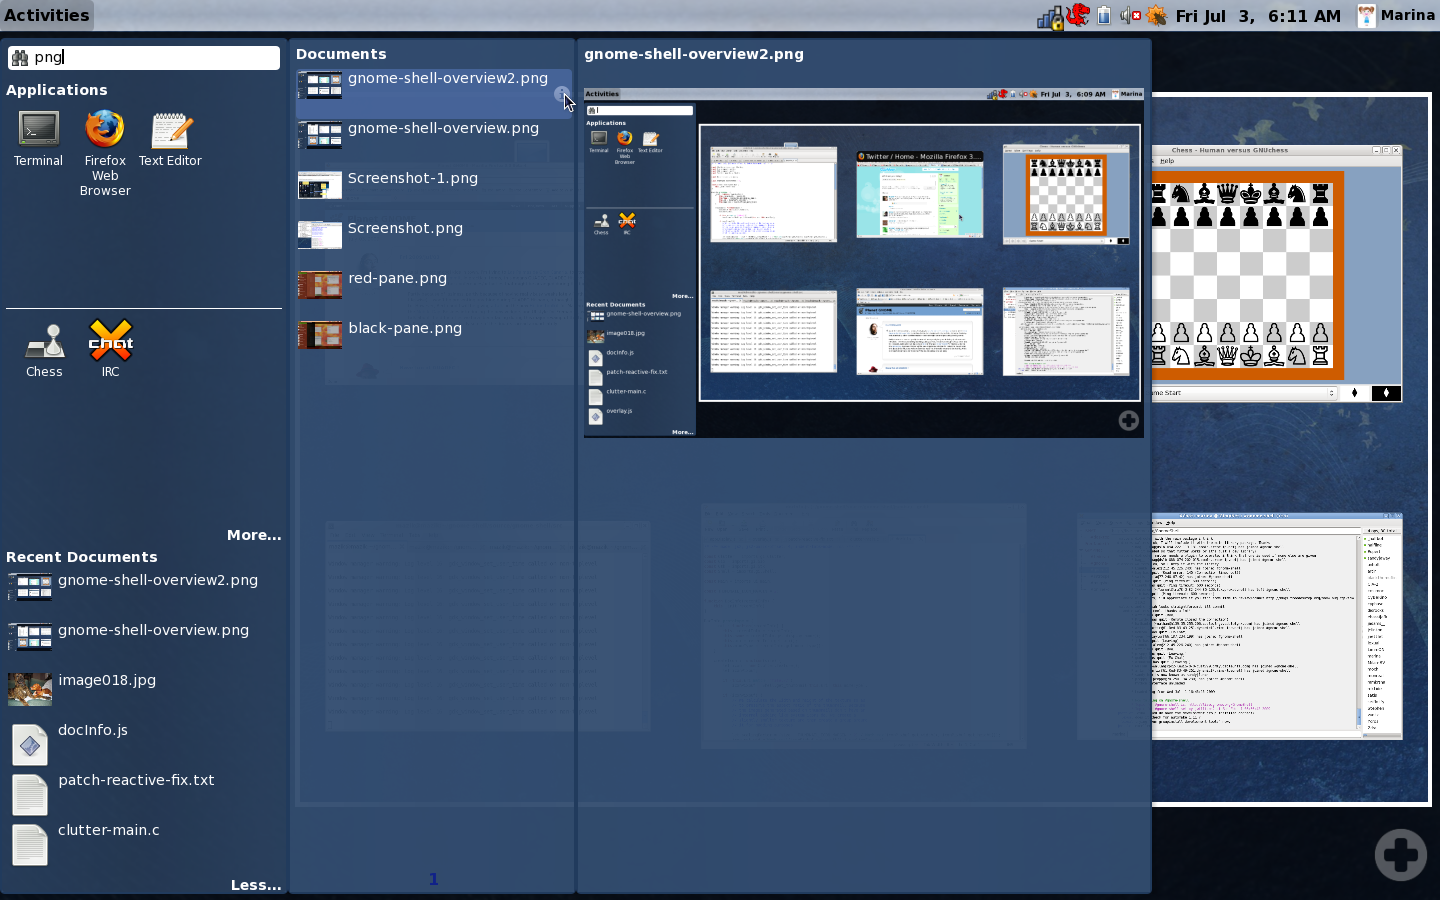
I will be sharing about how to install Gnome Shell on Ubuntu 11:10 Oneiric OCELOT. Unlike previous versions that are still using Gnome 2.3, in this latest release of Ubuntu Gnome 3 took 11:10, so we can enjoy a more modern GUI and beauty offered by Gnome 3 without fear of clashing with Unity, but unfortunately Gnome Shell is not installed by default .
To feel we need to install it first, Gnome Shell is available in official repositories on Ubuntu 11:10, we can install it via Console (ed: Terminal) or use the Ubuntu Software Center. To install it there are a variety of ways:
- Install Gnome Shell using apt.
- Open Terminal * Ctrl + Alt + T, then type the following command:
sudo apt-get install gnome-shell
- Or you can use the search feature available on the Ubuntu Software Center with the keyword "gnome-shell".

Wait until the installation is complete.


Once completed,
Restart your computer, after you enter the login page screen select settings> Gnome.


Gnome Gnome Shell Interface =
Classic = Gnome Gnome interface that has a top and bottom panels such as the Ubuntu 10.10
Gnome Classic (No effects) = Same as Gnome Classic but pick the less effect.
Ubuntu Ubuntu = Default Interface, which is Unity 3D.
Ubuntu 2D = Ordinary known as Unity 2D with less effect.


All Done. What do you think, more beautiful Gnome Shell or Unity?

Restore Data From Formatted HDD With TESTDISK

|0 comments
Did you accidentally reformat your hard drive?
Or you accidentally format the partitions on your hard drive?

To restore your data, it is possible to do is write back partition. Free tools that can be used is testdisk. Program can be downloaded here. This freeware can be used to write the partition with various specifications as follows:

DOS / Windows FAT12, FAT16 and FAT32
NTFS (Windows NT/2K/XP)
Linux Ext2 and Ext3
BeFS (BeOS)
BSD disklabel (FreeBSD / OpenBSD / NetBSD)
CramFS (Compressed File System)
HFS and HFS +, Hierarchical File System
JFS, IBM's Journaled File System
Linux Raid
Linux Swap (versions 1 and 2)
LVM and LVM2, Linux Logical Volume Manager
Netware NSS
ReiserFS 3.5, 3.6 and 4
Sun Solaris i386 disklabel
UFS and UFS2 (Sun / BSD / ...)
XFS, SGI's Journaled File System
To use TestDisk, things you should do is boot your computer. You can just use a linux live CD, or use traditional live usb with a flash.

To facilitate, for example you have a live CD boot Ubuntu receipts. Then, select the language and select the menu

"Try Ubuntu without any change to your computer".

After booting, open Terminal.

Login as root.

ubuntu@ubuntu:~$sudo su
root@ubuntu:/home/ubuntu#

TestDisk Copy the installer file to your computer, for example through the flash and extracts files. Because using ubuntu live CD, mount the flash was too itself.
Extract the files in my pendrive (CICA) to the folder / opt


root@ubuntu:/home/ubuntu#tar -xjf /media/CICA -C/opt

go to the folder / opt/testdisk-6.10/linux
then run testdisk_static


root@ubuntu:/home/ubuntu#cd /opt/testdisk-6.10/linux
root@ubuntu:/home/ubuntu#./testdisk_static

Choose  “Create…”

Then, select the device's hard drive, and "Proceed"


Select the partition type, eg "Intel"


Select "Analyse"


Then, select “Quick Search”

Then came the partitions that you created earlier. Select the partition, by pressing the left / right. Partition the selected green. For example, the partition which I will write again is the first and second partition ... Press enter

If you still have not found your partition, or you doubt whether that partition is the correct partition, you can search again by selecting "Deeper Search".

If already established, choose "Write"

Reboot your computer, and your partition will be read again ...